Improving Solidoodle Prints
September 29, 2013
When I begin to explain 3D printing to some of my colleagues, their jaw migrates to the agape position while:
- They are learning about a new technology that is almost magical and
- They are already figuring out how to use this wonder technology to solve some problem.
Case in point: a colleague asked about printing a replacement part for a RC car, but modifying and repurposing it for a completely different application. I recieved the part, discussed how we could modify it for his needs, measured, modeled and began to print.
And then small disasters struck! The piece is flat, which I thought would have given me great adhesion to the build platform, but I obviously had not tested this theory on parts with larger than a 1cm² footprint.
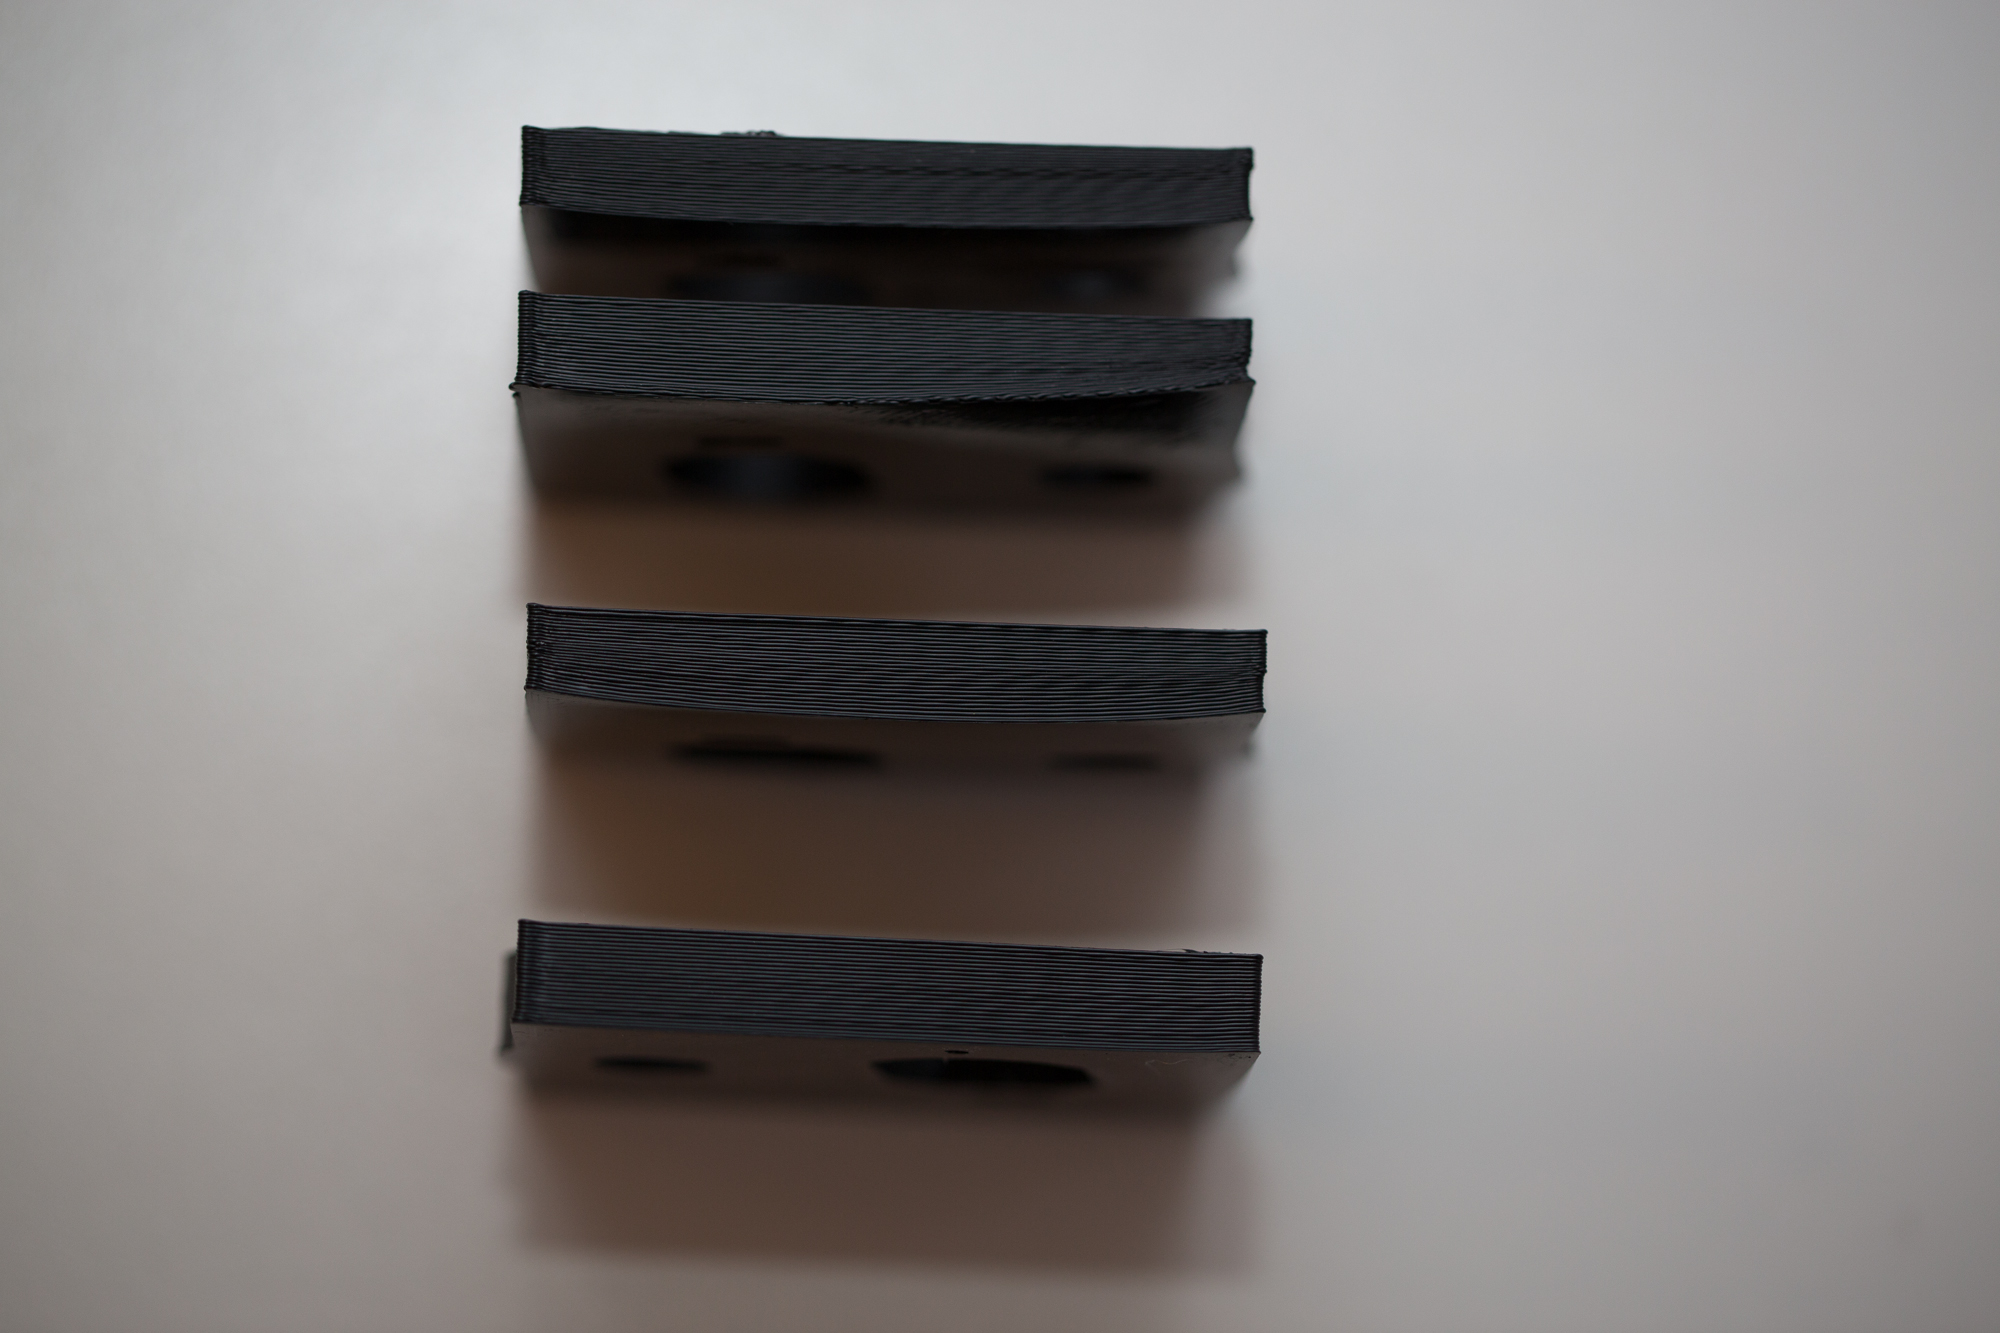
We have some warping problems (no, not the kind that Starship Enterprise did in the latest movie). See below.
 Prints after various tweaks
Here are the steps I took between each print, until I finally was happy with the output:
The first print became detached from the base since all of the corners started warping and tracking upwards. I believe since so little surface area was contacting the build platform, it just spun out of control when the nozzle was close at a certain point. Some old gooey filament on the side of the nozzle may have also contacted the part as well.
- Clean the nozzle
The second part finished, but the warping issue still persisted. To the Solidoodle forums I go!
- Raise the heated bed temperature to 100°C and fine-tuned the level of the platform according to Solidoodle’s website.
The third print did much better, although I was still not happy with the continuing warpage.
- Raise the heated bed temperature to 103°C (this was definitely scientifically chosen as a precise temperature… although this thread speaks of 100°C being a magic number). I also asked my wife for some hairspray. Apparently this stuff was engineered to make ABS parts really stick to the platform and as a side benefit also nicely styles hairdos.
The final part came out really nice. There is a minute amount of warping on one corner (less than .3mm or 1 layer). The bottom part in the photo above shows the final print.
For parts with more than a few cm² surface area contact with the bed, this is a must. I’ve read that with some tuning out of the box, this machine can really do some amazing stuff.