LED Thermal Management
December 18, 2018
What started as a simple light replacement over my in-law’s kitchen sink, turned into a minor engineering study.
Problem
LEDs provide an efficient means of illumination, especially considering energy usage and spatial requirements. In the particular case considered, LED illumination is provided over a kitchen sink (mounted under an overhead cabinet). The prior solution consisted of a low power 12V LED array, which provided illumination closer to an ambient light than a task light. Although LEDs are more efficient than a comparable CFL or incandesent at converting electricity into light, heat is still a significant byproduct. In the past, I have included lower power LEDs (less than 0.5W draw) in various projects and had not considered thermal considerations in the design. The following showcases a simple evolution of a design and the lessons learned along the way.
First Attempt

Increasing the light output above the sink with minimal intrustion and cost from the light are the primary goals in the design. In this case, problem solved. A 3W warm white star LED and a constant current driver from Spark Fun are my picks for cost and size. Further, I found some generic lens holders from Amazon to clean up the design. A simple enclosure was 3d printed to keep everything tidy. I was even proud of a simple snap design for the box lid. The light is not running at the full power rating: the Femtobuck with a bridged connection supports up to 660mA output, so the light consumed between 2-2.5W (of the 3W rating). The light output improvement is significant. a beam with a more focused aperature and at greater output is certainly up to the task. Problem solved, solved. Or so I thought…
Little did I expect such a catastrophic failure in a matter of days. The box melted and detached from the cabinet. The LED illumination dropped to nothing (essentially 0 lumens). I noticed that the tiniest sliver of light could be noticed if the LED was in a dark room. If I have learned anything in the world of engineering, it is of lessons learned through failure. I have learned many lessons.
The LED is hooked up to a motion sensor and I had assumed the light would never be on for more than 15 minutes at a time, but the kitchen is a busy place in a family household.
At this point, it appeared that the heat from the LED is the root cause of failure; a reasonable assumption.
Second Attempt
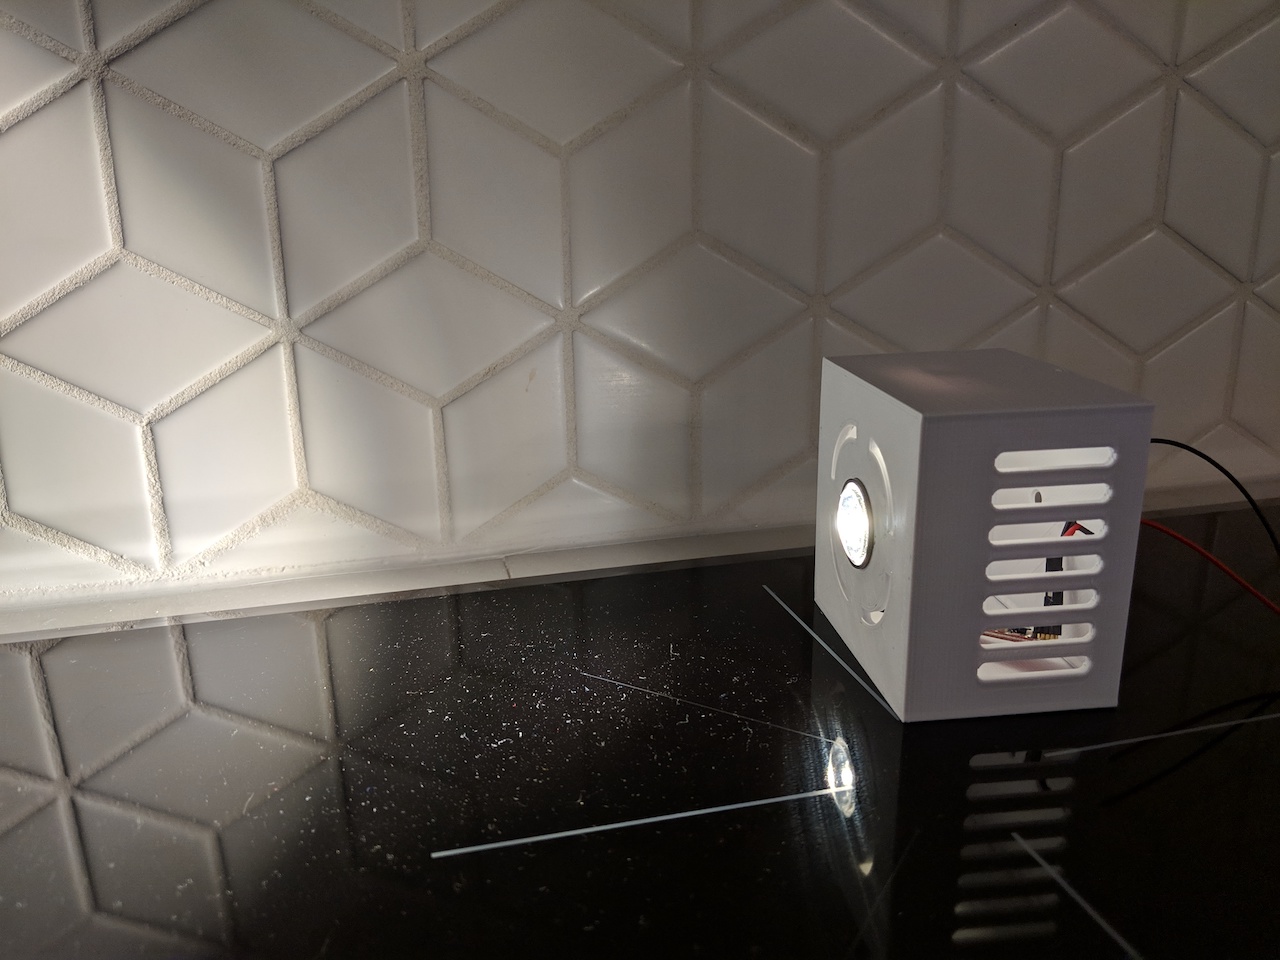
The follow up design accounted for improved heat management. In fact, the volume of the enclosure was roughly 4x of the original and also includes vents in both the vertical and horizontal planes. Not wanting a melted pile of plastic and a possible fire hazard again, I ran the light for an hour straight. The venting seemed to do the trick. Heat was not building and the enclosure even felt that it was only mildly warmer than room temperature. With a simple test exercise out of the way, I installed the follow up.
Within days, the LED failed. Fortunately, the box ws still mostly intact, but the lid did deform due to heat trapped. After closer inspection, I realized I should have scaled the snap fit detente with the size of the box.
At this point, it still seemed that heat is the problem, but that I incorrectly assumed ambient heat management was the issue. I assumed natural convection of the LED was sufficient.
Third Attempt in Progress
After some research on the matter, I concluded that thermal management of the chip itself is where I have failed.
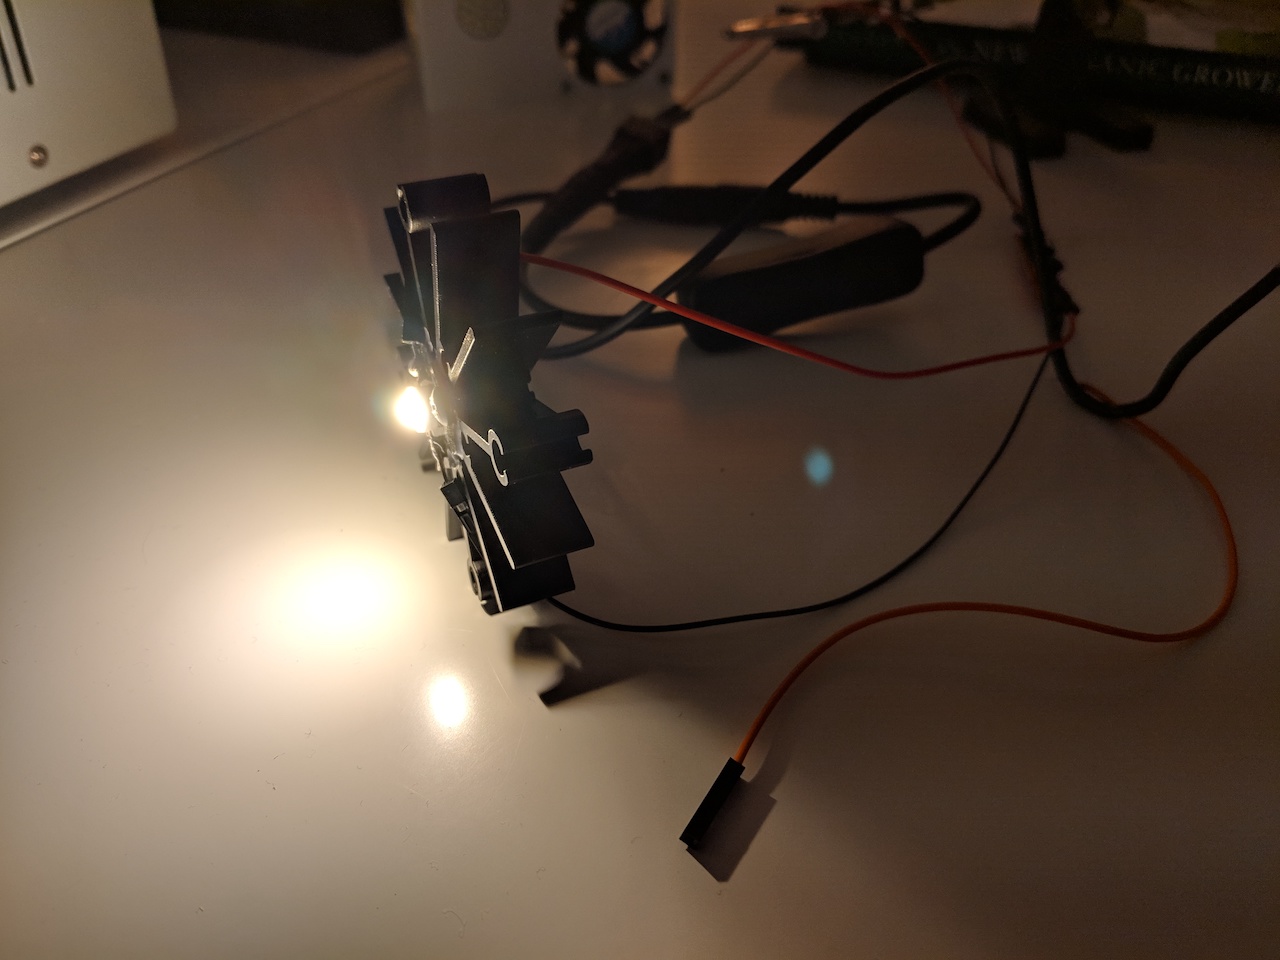
Although the star LEDs are “heatsinked”, they are really just mounts for an actual heatsink.
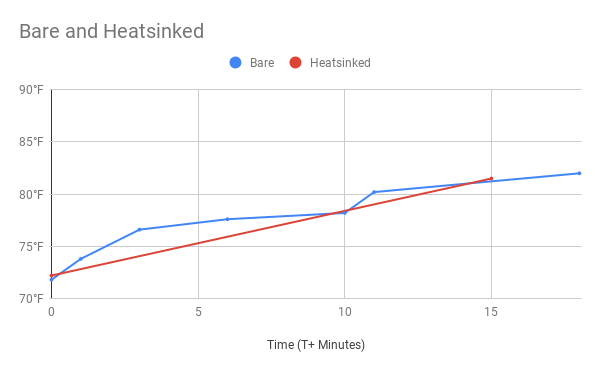
Although not shown in this graph, after 10 hours of running with the heatsink, the temperature managed to hover around 82° F, or around 11 over ambient. The readings should not be fully trusted as a quick swipe with a bare finger indicated much higher temps than where the infrared gun was pointed. I did my best to take readings of the same location (and offset distance from the target). Further, my 6 year old helped, but the overall trend is what is important. The bare LED rose to 82° within 20 minutes, whereas the heatsinked version remained stable at that temperature. The heat from the bare LED is enough to cause a burn and I decided to shut off the unit within 20 minutes to save itself from self-destruction.
Conclusion
Thermal management via convection, conduction and radiation are all prerequisites for a robust implementation. Design considerations for heat must be taken into account for both the chip itself and surrounding enclosure. I have yet to decide the ideal path forward, but it may involve a large partial enclosure around the start LED and massive heatsink.